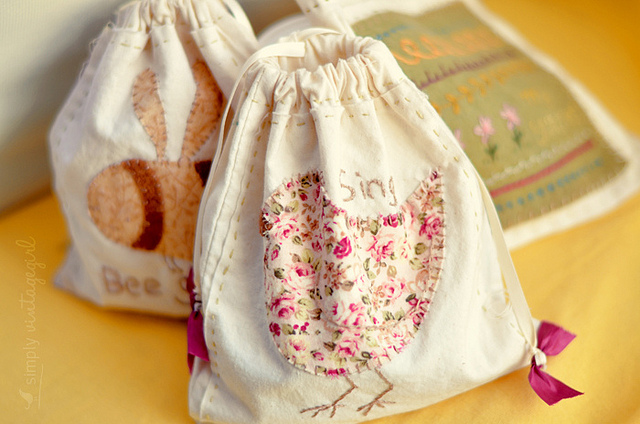
Several years ago my oldest daughter, Breezy, created a little bag that was so adorable that I wanted to make some of my own. This little bag tutorial is based off of her design. I have given directions for hand sewing and the stitches have a “rustic” look which adds to the beauty, but you can easily whip this up on the sewing machine for a more “polished” look.
You can also make this bag in different proportions depending on how you might use it. I keep my small embroidery projects in one. When we travel I like to fill one up with little things I will need to keep handy and carry it in my purse. It gives our travels a little taste of home.
This would make a great mother-daughter project. I hope you enjoy it!
Materials needed:
1/4 yard of Muslin
Embroidery Thread
1/4″ Ribbon – 18″ long
5/8″ Ribbon – 2 pieces cut 6″ long
Scraps of Print Material (for applique)
Scraps of Felt (for applique)
- Cut one 16″ x 8″ piece of muslin- body of bag
- Cut one 6″ x 6″ piece of muslin- for decorative front
- Fold 16″ x 8″ piece of muslin in half and sew with 2 strands of embroidery floss 1/4″ from edge on both sides. See photo below.
- Keeping the bag wrong side out fold down 1″ from the top and sew with 2 strands of embroidery floss all the way around about 1/4″ from bottom edge.
- Turn bag right side out and then make a small cut on the inside only as shown in the photo above. This will be where you will insert the ribbon.
- Decorate the front of the decorative piece using scraps of material, felt or any other items that you would like. This is where you can be as creative as you would like. I chose to do a bumble bee with the words “bee sweet”, a bird with the word “sing”, a cat that will soon have a mouse beside it, and a piece of felt with a stitch sampler on it and the words “my stitches”.
- As you decorate the front piece, you can use a basting stitch to hold down the applique piece while sewing it in place. A basting stitch is the same as a straight stitch except it has really long stitches and the thread is not knotted. The basting stitch can then be easily removed.
- Use 2 strands of embroidery floss and a simple straight stitch to sew the decorative front to the front of the bag making sure the slit for the ribbon is in the back. Have one hand in the bag to keep it open and help guide the needle. This step gets a little tricky as you sew it near the bottom, but just take your time and it will work out just lovely.
- Take a safety pin and attach it to the end of the 1/4″ ribbon and insert it into the cut slit at the top of the bag. Use the safety pin to push it all the way around and then back out of the slit. Pull the ribbon so the ends coming out of the bag are even.
- Use the end of the 1/4″ ribbon and tie a knot with it around the middle of the 5/8″ ribbon. And then tie a knot with the 5/8″ ribbon as well. This will give the ribbon a nice decorative end and keep it from sliding through the slit in the bag. You can sew a few stitches around the knots of the ribbons to keep them in place, but it may not be necessary.
- Now fill it with little treasures.
Beginning Hand Sewing
Adventure Pouch by Emily Rose, for the more rough and tumble needs. It also shows how to make a flat bottom.
May the times that you spend with your daughters sewing and working on a variety of projects be times of learning and growing together. You will both reap the benefits!


