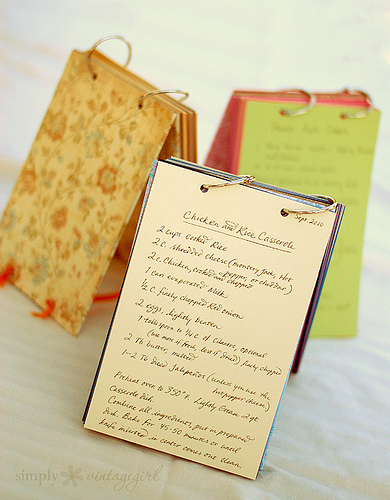
One of the things that I treasure is cooking for and with my family. It is such a special time to be in the kitchen talking and working alongside of each other, sharing recipes and family favorites. We also enjoy discovering short cuts to make our kitchen more efficient.
One thing that I wanted to do this year was to organize my recipes a little differently than what I had previously. We all have recipes and they need to be stored in some fashion, whether it is in a card file, 3-ring binder, computer files (like Carmen’s post) or some other system.
What I was wanting was something that would stand up, be easy to read, and, just as important: “be cute”. After seeing a creative idea for a mini-scrapbook in a scrapbook magazine, I thought it would translate well into a way to hold my recipes.
My first attempt was similar to the mini-scrapbook and was just a little thing around the size of a 4 x 6 picture. It was too small.
Next was a full 8 1/2 x 11 with plastic sheet protectors on the pages, with the three-ring holes cut off. It was too big.
So I tried a half-sheet and it was just right. So here is my tutorial on my half-sheet standing recipe holder.
17″ x 5 1/2″ chipboard or matboard
3 8 1/2″ x 11″ sheets of scrapbook paper
several sheets of 8 1/2″ x 11″ colored cardstock
adhesive
hole punch
2 pieces of 16″ ribbon
2 metal rings (found near embroidery threads in craft stores)
eyelet hole punch & hammer
cutting tool for chip board (see instructions)
I used chipboard for my recipe holder, but you can use matboard or any other stiff board. Chipboard is what is used on the back of spiral-bound notebooks (We get sheets of “single thick” chipboard from Dick Blick). I cut down a large sheet of chipboard with an old rotary cutter (it would probably dull a new blade on a rotary cutter). A craft knife would work just as well.
Very softly with your rotary cutter or craft knife make a light cut (or “score”) across the chip board directly in the middle; just enough to be able to bend it:
Now your chipboard should be divided by a crease into two attached halves. Here’s how you’ll separately cover each half of the chipboard, front and back: Take two pieces of scrapbook paper and fold them each in half. Take the third piece, cut it in half, and then fold each of those halves. Using adhesive, sandwich each half of the chipboard with the folded scrapbook papers.
To make a template, cut a piece of cardstock into two 8 1/2″ x 5 1/2″ sheet. Take one sheet for a template and measure in 1 1/2″ in on both sides and down 3/8″. Mark and punch holes.
Lay template on covered chip board, take eyelet hole punch and punch holes in top and bottom on both sides.
Fold the chip board and put in the metal rings in the top holes. Take the 2 ribbons and thread through the bottom holes; secure with knots about 5″ apart.
Cut the rest of your cardstock in half to make 8 1/2″ x 5 1/2″ sheets. Using your template, mark where to punch holes on the top of each piece of cardstock. Punch holes. Place cardstock on rings. And there you have it- a standing recipe holder. Now you can put all of your favorite recipes on it and know exactly where they are and be able to easily read them.
When I write out my recipes, I look for ways to simplify them so I don’t have to write as much and it makes it easier to read. I like to make little notes or put dates on the recipe when we first tried it or some other tidbit, even putting some stickers on the pages to make them extra fun. I am also planning on putting some tabs on the pages to the side to be able to find the recipes quickly.
Tips: The larger recipe holder would make a wonderful addition to your homeschool. I wish I would have had one all these years. It could hold memory verses, art prints, vocabulary words, math facts, schedules, calendars, etc. The smaller one could also be used in several ways. Just get creative and see what you come up with.


