Our sweet contributor Ana from The Lost Apron is sharing today:
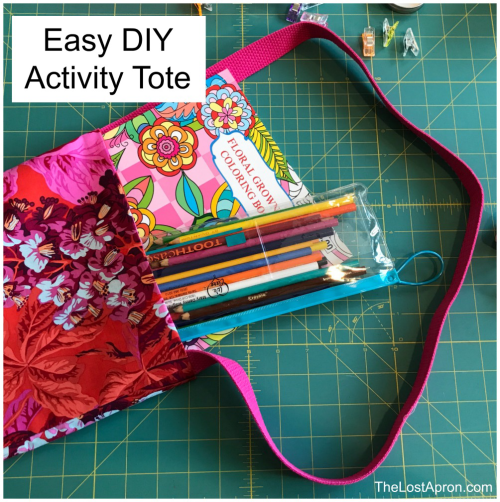
This Easy DIY Activity Tote is perfect for children to have some activity essentials on-the-go. This is a project that your children can learn about designing and learn to sew for themselves. The strap can be worn on the shoulder or as a cross-body bag.
- 1 yard of fabric (non directional)
- 1 yard of 1″ wide cotton webbing
Design the Tote
I have my special-needs sister staying with me, so I thought I would teach her to sew. I saw she had a bag with an attached strap, but would hold the bag itself, so I thought a shoulder strap would work better. Whoever the tote is for should be part of designing the tote.
Determine the size: My sister wanted the tote to fit her activity books and pencils. The finished tote would be 10″ wide and 12 1/2 ” tall. You can make your tote any size you want.
Calculate the fabric dimensions: Once you determine the size of the tote you want, add 1″ to the width. Multiply the length by 2, then add 1″. So my sister’s tote needed to be cut 11″X 26″. Calculated as 10 + 1= 11 for the width. 12 1/2 X 2 = 25. 25 + 1 = 26 for the length. I really only needed 3/4 yard, but we bought 1 yard to have extra.
See Yardage Chart to determine your fabric needs. Print your own chart: Yardage Chart
Pick the materials: We took a trip to the local quilt shop. There is something about being in a fabric store that ignites creativity. I could have had my sister pick from my stash, but I thought the store would get her creative juices flowing. She knew she wanted flowers. She picked one from an area the shop owner told us. We took the bolt over to the cotton webbing and could not find a good match in the limited colors they had. She loved the fuchsia, so we picked the webbing and put the bolt back. Our new search was to find a fabric that matched the strap. She was quite proud of her choice. (Because the tote does not have a bottom seam, do not pick a directional fabric otherwise one side of the tote will have the pattern up-side-down.) While at the store, you can drape the strap webbing how it will be worn and determine the length to purchase.
Determining the size and choosing the materials is all part of designing. Giving this part to children is great to develop creativity.
Teaching Special-needs Children to Sew
Do not underestimate what special-needs children can do. My sister is high functioning so I was sure she could learn to sew. Because I teach children as young as 7 on a sewing machine, I knew what kind of coordination was needed. If you are unsure if you should take on this task, ask these questions:
- Ask yourself: “Can she do what a 7 year old can do in other areas of coordination and following directions?”
- Ask her: “Do you have the desire to learn to sew?”
If both answers are “Yes!” then she can definitely learn to sew. Teach her as you would any other child.
Read Sewing My First Stitch for help in teaching children to sew.
Cut, Clip & Sew
Cut: Cut 2 pieces of fabric 11 X 26 inches (or the dimensions that you determined in designing.) One piece is for the tote. The other is for the tote lining. You could also use 2 different prints of fabric if you like.
Clip: Fold each piece in half with the right sides together. With the edges even, clip all 4 sides as shown. (I like to use Wonder Clips for children instead of pins. (See Wonder Clips vs Craft Clips for clip options.) Mark a 3″ space on lining piece to leave an opening. I like to use washi tape for this.
Sew: Sew down 4 seams with a 4/8″ seam allowance, leaving an opening where marked.
Sew In Lining
Press the seams: For children, I like to press the seams to the side instead of pressing them open for 2 reasons:
- If they do not yet sew very straights, it is easier to press to the side and make a straight crease, instead of following the curves by pressing the seam open.
- When it comes time to sew the lining seam, the seam allowance will not get caught in the presser foot. It will be sewn down in the same direction.
I like to use the sleeve board to iron the seams. Press all 4 seams.
Turn: Turn the tote piece right-side-out and press. Do not turn the lining piece.
Note: I usually iron for children if they are young, or not coordinated enough to use an iron.
Attach the strap: Measure the strap against the body to determine the proper length. Cut if necessary. (We used the whole length.) Pin the strap as shown centering each end at the top of each of the side seams of the tote bag.
Insert: Insert the tote and the strap into the lining. Match the side seams. The right sides of the tote and the lining should be together.
Clip: Clip all the way around the top of the tote matching the tote and the lining edges. Clip in the strap as well and remove the pin.
Note: If the free arm passage way under your sewing machine is narrow, the wonder clips may not fit. In this case you will have to use pins. My Bernina sewing machine passage way is wide enough for clips.
Sew: Using the free arm of the sewing machine, sew 4/8″ all the way around the top of the tote. Back-tack at each of the straps for extra strength.
Note: I like to use the table plate when sewing seams, then only use the free arm when needed.
Turn and Press
Turn Right Side Out: Find the opening in the lining. Reach in and find the surprise. Continue to dig in and pull the entire bag out of the tiny opening. It will look like one large pillow. Insert the lining portion into the tote. Align the corners.
Press: Press the upper edge of the tote.
Optional: Hand stitch the small opening closed. Because the seam is pressed to the side and it is a small opening, closing up the seam is optional.
The tote is ready to be shown off. My sister is very proud of her accomplishments. We may need to buy more activity books.
My name is Ana Sullivan. I began my blog, The Lost Apron, because people would ask me for advice on parenting. My only qualifications for giving advice is that I have been there and I am proud of who my children have become. I have a daughter in college, a son and another daughter that are college graduates who are working and living on their own. I have been married for almost 30 years to a dream of a husband.
I have been a working mom, a part-time-work-at-home mom, and a stay-at-home mom. Although I have preferred being the SAHM, I try to write my blog in a way that would encourage all moms to be better moms. I hope to be the mentor mom to the young mom and the friend to the older moms and grandmothers. You can visit me over at Pinterest, Instagram, and Facebook.