Our sweet contributor Ana from The Lost Apron is sharing today:
An easy way to make a handmade gift is to start with a ready-made apron and add a fun pocket. This DIY Bunny Pocket only needs some playful fabric to turn a plain apron into a cute rabbit kid apron.
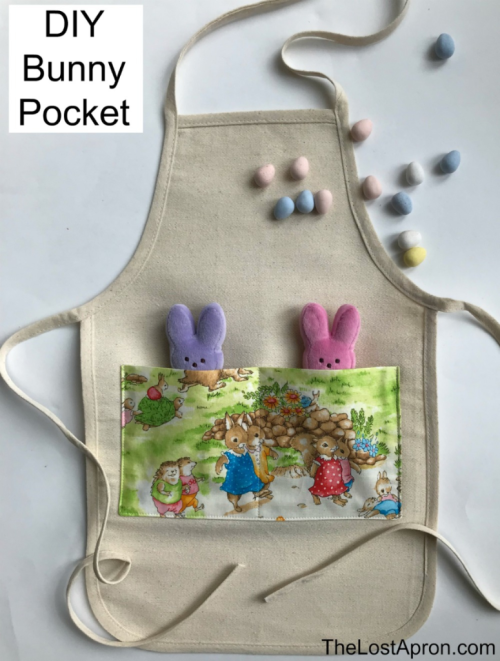
For all materials used, see Bunny Pocket Materials.
Size of the Pocket
- Determine the available size on the front of the apron and what size pocket will fit in that space.
- I decided on 10″ wide and 5 1/2″ tall for the finished pocket.
- To determine the cut size, add 1″ to the width. Multiply the height by 2, then add 1″.
- My pocket fabric should be cut 11″ wide by 12″ tall.
Cut the Pocket
- Search the scene for a good placement to cut the pocket. Use a 6″ rotary ruler and keep an eye on the 11″ marking for the width and place ruler on a good scene. Remember there will be a 4/8″ allowance on the left, the bottom, and the right. The top of the ruler will be the fold of the pocket, so it does not need an allowance.
- Cut bottom side: Cut the bottom of the pocket along the ruler with a rotary cutter from the selvage to the zero line.
- Cut left side: Leaving the ruler in place, begin cutting up the left side of the pocket along the zero line. Give the ruler a quarter turn clockwise so that the ruler is along the left side with the 12″ mark is at the bottom of the pocket and continue cutting upwards to the zero line.
- Cut top side: Leaving the ruler in place, begin cutting across the top of the pocket along the zero line. Give the ruler a quarter turn clockwise so that the ruler is along the top of the pocket with the 11″ mark is at the left of the pocket and continue cutting towards to the zero line.
- Cut left side: Align the pocket on the mat and make the final cut at 11″ wide.
- Fold the pocket in half by bringing the top edge of the fabric down to meet the bottom edge.
- Using an erasable pen, mark a pivot dot using a 4/8″ pivot card or ruler at the 2 lower corners.
- Use a piece of washi tape to mark an opening along one side.
- Pin or clip the 3 edges.
- Start sewing a 4/8″ seam at the top right side.
- Leave an opening over the washi tape.
- Pivot at both corners with the needle down close to the dot.
Turn and Press Pocket
- Trim the lower corners diagonally close to the stitching.
- Remove tape from opening and place a card along the stitching line. Fold one layer of fabric over card and press seam allowance of opening.
- Turn pocket over and repeat on the other layer of fabric of opening.
- Reach fingers inside opening and turn pocket right side out. (It will look like a pillow.)
- Poke out corners using a point turner through the opening.
- Press flat.
Prep Pocket to Apply onto Apron
- Using an erasable pen, draw a line down the center of the pocket to mark the double pocket stitching line.
- Lay the apron on the cutting mat so it is straight.
- Lay the pocket onto the apron in a desirable location. Be sure the chose scene is upright. (The fold of the prepared pocket should be at the top.)
- Use a ruler to help level and center the placement of the pocket.
- Pin around the 3 sewn edges of the prepared pocket. The opening that was left in the prepared pocket will be sewn down when the pocket is stitched down.
- Place one pin at the top center of the pocket also.
Apply the Pocket
- Stitch the pocket in place by sewing close to the edge of the prepared pocket.
- Begin at the top right corner of the pocket.
- Pivot with the needle down at both corners.
- Finish at the top left.
- Turn the apron around to sew the center line.
- Begin at the bottom of the pocket and stitch on the line to the top of the pocket.
- Press the pocket and remove the marking.
My name is Ana Sullivan. I began my blog, The Lost Apron, because people would ask me for advice on parenting. My only qualifications for giving advice is that I have been there and I am proud of who my children have become. I have a daughter in college, a son and another daughter that are college graduates who are working and living on their own. I have been married for almost 30 years to a dream of a husband.
I have been a working mom, a part-time-work-at-home mom, and a stay-at-home mom. Although I have preferred being the SAHM, I try to write my blog in a way that would encourage all moms to be better moms. I hope to be the mentor mom to the young mom and the friend to the older moms and grandmothers. You can visit me over at Pinterest, Instagram, and Facebook.